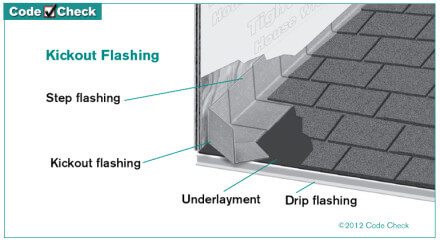
Kickout flashing might be one of the most important details to get right when it comes to preventing major water damage to a building. Kickout flashing is a simple little piece of metal that directs water out and away from a building when a roof surface ends at a wall. The illustration below, used with permission from the fine folks at CodeCheck, shows how this works.
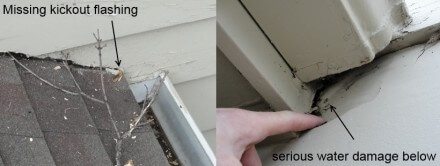
Here’s an example of kickout flashing not installed, along with major water damage below the area where the kickout flashing was missing.
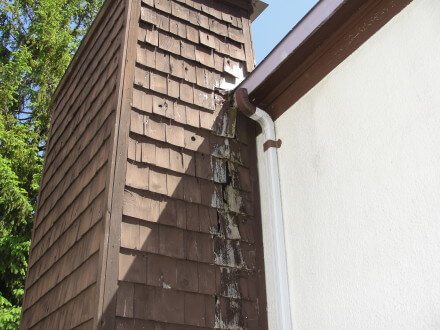
The rotted siding shown above is just the beginning; the real damage will be inside the wall. Here’s another photo showing some more obvious damage.
Kickout flashing has been a requirement in Minnesota since 2007, when the 2006 IRC was adopted. The 2006 IRC made no reference to kickout flashing, but the Minnesota State Building Code amended section R703.8, and this text was added on:
[Approved corrosion resistant flashing shall be installed at all of the following locations:]
9. Where the lower portion of a sloped roof stops within the plane of an intersecting wall cladding in such a manner as to divert or kick out water away from the assembly.
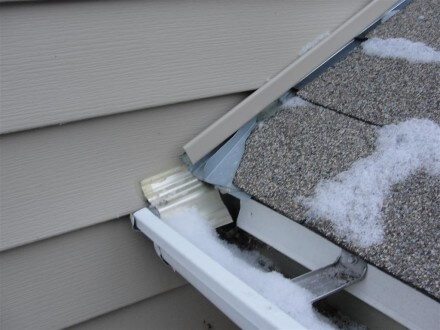
This is still the building code that is in force in Minnesota today. My only beef with this language is that it’s not very specific, making cheesy installations like the type shown below ‘legal’. Arguably.
I guess it’s better than nothing, but come on! That’s just silly. The only reason I find goofy installations like this is because of ignorance; it’s quite simple to make a perfectly effective piece of kickout flashing with a standard piece of step flashing. If everyone knew how to do it, it would always be done right. Here’s a short how-to video that I made, which shows how to easily bend up a piece of step flashing to create a kickout.
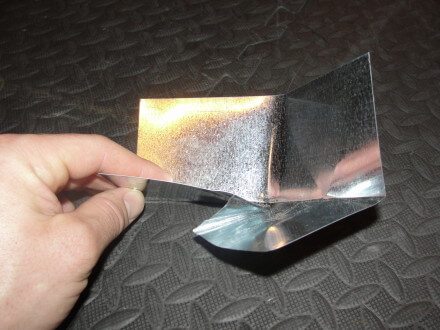
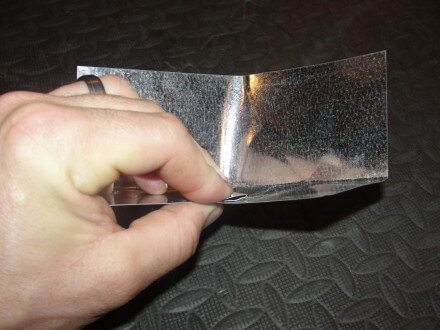
Post update 5/22/13: Here are two more photos showing the bends in the flashing. The first shows the bend I made in the video using a longnose pliers, and the second shows what I did with the vice in the video to make the bend flat.
Author: Reuben Saltzman, Structure Tech Home Inspections

Gordy Kaufmann
May 21, 2013, 8:51 am
Reuben,
That’s a great way to make kick-out flashing. It might be more helpful to get some close-up shots of the flashing as your bending it and of the finished product. That’s just my two cents.
Reuben Saltzman
May 22, 2013, 4:33 am
Good idea, thanks. Done and done.
Ryan Hart
May 23, 2013, 9:41 pm
Thanks for posting photo evidence of why kickout flashing is so important. Seems like a minor detail until you have to deal with the consequences. I will be sure to look out for it in the future.
Home Inspections and Infrared Cameras | Structure Tech Home Inspections
September 19, 2013, 4:11 am
[…] We rarely use infrared cameras outdoors because the sun really messes with our results, but we’ll occasionally get a nice image at the exterior that illustrates suspected water intrusion. The image below shows a suspected leak at the wall of a stucco home with missing kickout flashing. […]